Introduction
In order to upgrade my home network, I needed a small server to host some services (e.g., a DNS ad blocker) and to store some data (mostly digitalized documents and backups of cloud data). The solution had to factor in the following requirements:
- The storage strategy had to be solid to avoid data loss. It also had to be possible to recover quickly from failures to maximize availability. However, since the services and the stored data are not essential to my existence, down-time of the server and data loss in extreme situations could be tolerated.
- The overall system should be power efficient since it runs all the time. It should also be cheap to build. Thus, the running cost as well as the initial cost should not be too high.
- The system is not doing particularly power-hungry tasks, but should have enough memory to host multiple running applications or virtual machines at the same time.
The solution I came up with after doing some research online was a setup of two servers and the main operating system TrueNAS SCALE. The remainder of this article describes this setup, including the used parts and the software configuration.
Disclaimer: My main goal is to provide an overview of the decisions I made that might help other people to make their own. I will not explain every little step in detail since there are many guides already available that do this for distinctive parts of the setup, e.g., choice of hardware, building process, software configuration. I include links to helpful guides throughout the text. Also note that, although I have some experience with a lot of topics in computer science, I am by far not an expert in building and setting up home servers. So, do your own research and ultimately make decisions for yourself.
Basic System Architectur
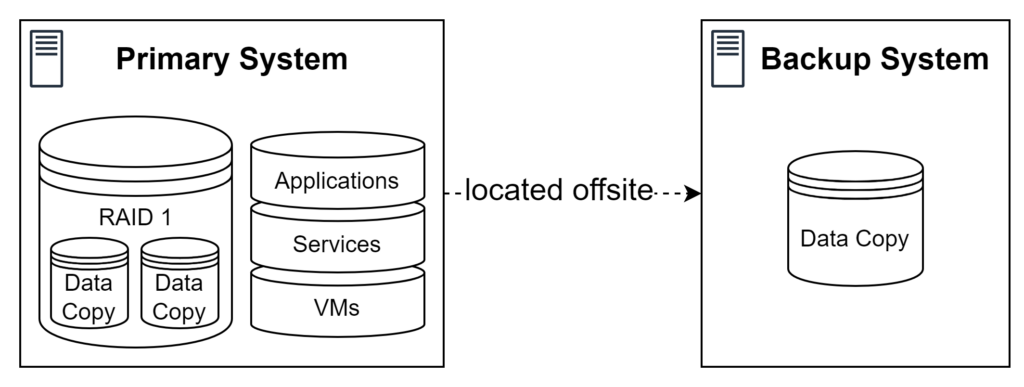
The basic system architecture is based on two separate machines (two separate NASs) where one acts as the primary NAS (subsequently called primary system) and the other one as the secondary NAS (subsequently called backup system). The primary system is the main machine that runs all applications, provides access to all stored data, and is physically located at my flat. It runs TrueNAS SCALE as its operating system. The choice for TrueNAS SCALE was made due to positive experience with TrueNAS Core in the past and some excitement for the new Linux foundation which, particularly, allows using Docker for an easy deployment of applications. The backup system is only used as a backup machine that stores an offsite backup of all data of the primary system. The backup system runs at a different house is realized as a pre-built one-bay NAS from Synology. All data of the primary system is stored on two hard disks (HDDs), configured in a mirrored RAID (RAID 1). Thus, the system loosely follows the 3-2-1 backup rule with three data copies (two on the primary system and a backup on the backup system) on two different types of media/machines (the primary system and the backup system), where one is located offsite.
Hardware
Hardware of the Primary System
The primary system will be a custom-built PC which makes it relatively cheap compared to a prebuilt NAS, easily upgradeable, and predictable with no custom firmware or anything like this. The finished system is composed of the following components:
| Case | Fractal Design Node 304 White |
| Power Supply | Be quiet! System Power B9 300W (BN 206) |
| Mainboard + CPU | ASRock J4125 ITX Board |
| RAM | G-Skill 2 x 8 GB Ripjaws DDR4-2400 |
| SSD (Boot) | Western Digital 500GB SATA Blue SSD |
| HDDs | Western Digital 2 x SATA 4TB Red Plus |
The case is a compact, good-looking case that fits up to six HDDs and a standard ATX power supply. Therefore, it is a good choice for an upgradeable, cheap system. The case does only support ITX-sized motherboards, which generally limits our options. Normal desktop and server ITX boards are quite expensive, require a separate CPU, and also need a dedicated CPU cooler. To avoid all these downsides, I decided to use a motherboard and CPU combination from the Intel Atom family. These boards are relatively cheap, do not require you to buy a separate CPU with a cooler, and are mostly fine for builds with moderate performance requirements. RAM compatibility is a problem with these boards, and working sticks are rare. The pair of sticks listed above work for me and provide enough memory for running TrueNAS and some additional services. The amount of memory could probably also be extended in the future. The SSD is used as a boot drive for TrueNAS SCALE and was something I had lying around. It could be much smaller, but should definitely be flash storage. The HDDs from Western Digital are reliable disks that are specifically designed to be used in storage servers and fit our needs. To allow upgrading in the future, the board has a total of four SATA slots. If this is still not enough, the number of SATA ports can be extended with HBA cards connected via PCIe. The building procedure of the system is the same as for a normal desktop PC. If you are not familiar with this, you should probably watch tutorials such as this one.
Hardware of the Backup System
The backup system is the one-bay NAS DS-120j from Synology. The decision not to build a custom machine has multiple reasons: I do not have to worry about choosing and buying the parts and, ultimately, building the machine. Furthermore, it is an easy replacement if something fails as I can just swap the entire machine. Additionally, I do not need to be flexible with the operating system or the storage configuration, since the backup system does not run any applications (apart from the ones being used to back up the data).
Installation of the Primary System
Installation of the Operating System
The installation of TrueNAS SCALE on the primary system is usually straightforward. The first step is to install the TrueNAS SCALE image on a USB stick. The image can be found online. It is recommended to not use the beta version for a system that is in daily use and holds important data! You can use different tools to install the image on a USB stick. You can use the tool of your choice, and I used Rufus for this. Follow the available guides to install a Linux-based bootable USB stick, e.g., this guide with Ubuntu as an example. After the USB stick is created, it is time to start the primary system and install TrueNAS SCALE.
Before doing this, we can change some settings in the BIOS according to our use case:
- Disable the front audio of the mainboard since it is not needed. You can also disable the front USB if you do not plan to use it.
- Turn on virtualization. The settings for this are usually called VT-x and VT-d. This is needed to run any kind of virtualization software on the system.
- Enable the settings of power on after reset to make sure that the system restarts after a power loss.
- Turn off fast boot and secure boot since it might cause trouble in some cases.
If this is done, restart the system and make sure that it boots from the USB stick to start the installation process of TrueNAS SCALE. I will not explain the individual steps of this process, since there are many guides (e.g., 1, 2, 3) already available.
Initial Setup of TrueNAS SCALE
After the installation has finished, and you have rebooted the system, you should see the console setup of TrueNAS SCALE that shows the IP address within your local network where it is available. We can proceed with the next steps from the GUI in the browser. Therefore, open the shown IP address in your browser. You can log into the system with the user root and the password you have set during installation. Now you see the dashboard of TrueNAS SCALE. I recommend doing a few changes before doing anything else:
- Set your locale settings (System Settings → General → Localization Settings) if they are incorrect.
- Turn off usage and crash reporting to iX systems under System Settings → General → GUI Settings → Crash Reporting/Usage collection.
- Create a network bridge which is needed for communication between apps and your host system in later steps. This step might be a little bit tricky since you need to transfer your current IP (that you are accessing the GUI on) to the new bridge. Carry out the steps described in this post:
- Navigate to the network tab.
- Open the settings for your main interface (is named
eno1in my case) and make sure that it does not use DHCP and a static IP instead. You should set it to the same IP as the one obtained from DHCP for now. Save the changes, test them, and then save again. - Edit your main interface and remove the static IP again. Save the dialogue, but do not test the changes!
- The bridge can be created under Network → Interfaces and a click on Add. Select the type Bridge and give it a name such as
br1. Select your common network interface (eno1in my case) as a bridge member. Set the same static IP that you used on the main interface. Save the dialogue and test the changes. - This process can take a while, and it might be necessary to log in to the interface again. In any case, navigate to the network tab and save the changes to make them permanent.
- The created bridge should now be used as the network adapter for all applications and services.
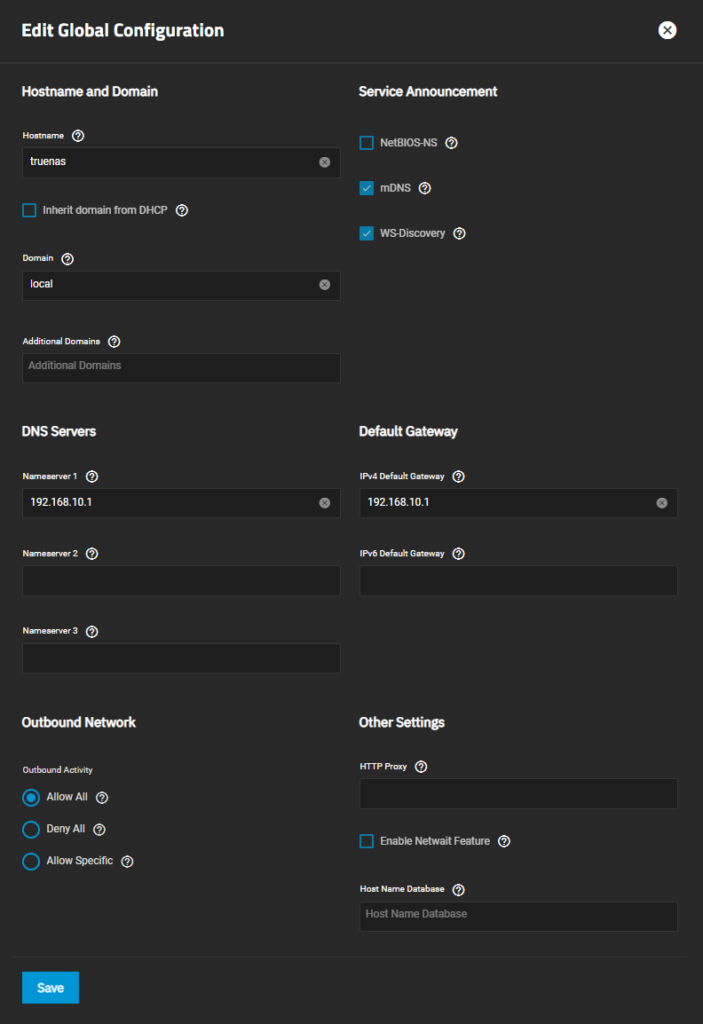
- Set your nameserver and your default gateway under Network → Global Configuration → Nameserver 1/IPv4 Default Gateway. Both values should be set to the IP of your router.
Storage Setup
As mentioned before, the data on the primary system should be mirrored to provide high availability in case of failures. Since we have only installed two drives, we create of single pool. To do this, click on Storage → Create Pool. Give the pool a name (I named it main-pool) and add the disks to it. Usually, you should be all set up by simply clicking on Suggest Layout, but you can also add two disks as VDevs and select a Mirror layout. Confirm if you are prompted to. The pool should now have been created together with the main dataset. You can find more information on ZFS pools and datasets on the web (e.g., 1, 2).
Installing Apps and Services
Besides using the machine for simple data storage and sharing, my main intention is to host several apps and services. There are two ways to do this in TrueNAS SCALE: virtual machines (VMs; found under Virtualization) and apps, managed by Kubernetes (found under Apps). If you are not familiar with virtualization and containers, you can find more information in this article. Due to the fact that VMs are usually harder to set up and make it necessary to deal with a lot of not needed complexity, I prefer containers for my use cases whenever possible. The apps/services that I need are the following:
- Heimdall: Creates a configurable dashboard to display images with URLs of all important addresses in the home network. It is a useful entry point into the local infrastructure.
- AdGuard Home: Provides a DNS service for filtering DNS requests of machines within the local network. It can also be used to rewrite requests, which is useful to reach local machines via a custom DNS name. This service is installed as a virtual machine.
- Paperless-ngx: Is a simple document manager with a neat Web UI and nice search capabilities. It can also do OCR with your scanned images/documents.
- Uptime Kuma: Monitors services and websites. I use it to monitor the availability as well as the performance of the other services.
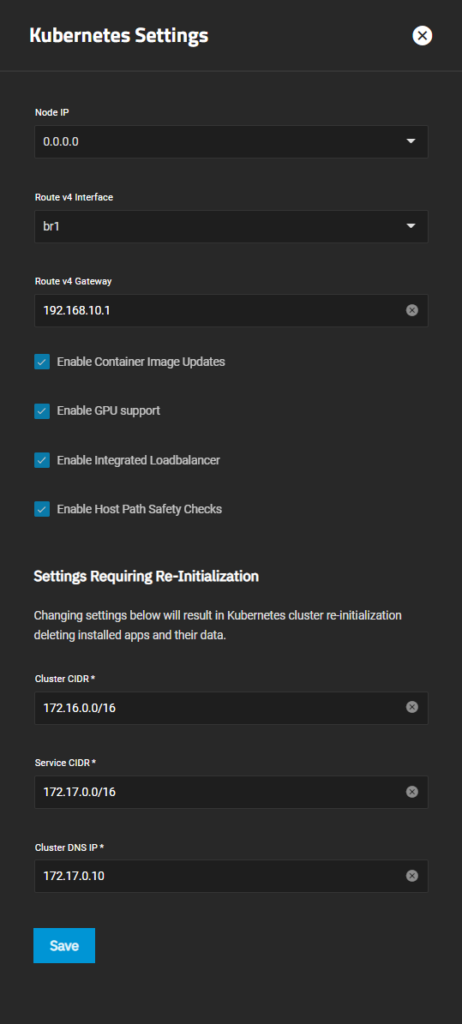
Let’s start with the services that are installed as apps, which are Heimdall and Paperless. When you first click on Apps, you will be asked to set your pool for apps. You can choose your main pool here. Afterward, we have to make sure that Kubernetes is configured correctly. Therefore, click on Available Applications → Settings → Advanced Settings and compare your values with the ones from my screenshot (see below). It is important that the interface is set to your bridge interface and the gateway is set to your router. All other values should be fine by default.
The next preparation step is to set up the TrueCharts app catalog. TrueCharts is a collection of apps that can be installed and run in TrueNAS SCALE with only a little of configuration. How to add the catalog is described in detail here. Please be aware that synchronizing the catalog might take some minutes. You can see the progress in the task manager.
The steps for creating these apps are mostly the same in every case. However, there are individual categories of settings and individually-named settings for each app. Therefore, I will only explain the most important generic steps and go through the specifics for the individual apps. See screenshots of my configuration for Paperless-ngx below this list.
- To start the installation process of an app, navigate to the Apps section and click on Available Applications. Select the app that you want to run, click on Install, and wait for the modal to open.
- The Application name uniquely identifies the application on your system. Choose it as you like.
- In the next section General Settings you can set the number of replicas (which is usually one), the timezone, and environment variables.
- Many apps also have very specific settings regarding its functionality. The category for this is usually named App Configuration. You should check the correct settings for each app individually, either in the documentation of the app or in the documentation of TrueCharts.
- You should always carefully set the settings in Networking and Services. I prefer to set static IPs for most apps. To use them, you should set all service types to Cluster IP to not expose them on the TrueNAS SCALE host machine. Then, scroll down and click on Show Expert Config. Now you should add an external interface with the bridge network adapter as the host interface. Finally, add a static IP. Click on Next to go to the next category.
- The storage settings under Storage and Persistence are also important. I would recommend using a separate dataset for each app and a sub-dataset for each chunk of data that the app uses. Therefore, first create the required datasets in the Storage tab. For each chunk of data, now select Host Path as type of storage and set the host path that you created just before. See the picture for an example. Sometimes, it is also needed to set Automatic Permissions to avoid access problems.
- Ingress can provide external access to Kubernetes apps. Only use it, if you really need it, e.g., to enable HTTPS access to one of your apps.
- The settings under Security and Permissions can usually be left untouched. However, sometimes it is also useful to change something there, e.g., to correctly set user permissions within the app or to resolve access problems.
- Skip all further categories until you come to Confirm Options. Click Save to save your configuration and deploy the application. You are now redirected to the tab of Installed Applications, where you should see your app.
You can find a helpful walkthrough of such an installation process for the example of Jellyfin, and below are some screenshots of my app configuration of Paperless-ngx.
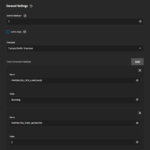
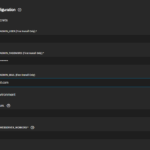
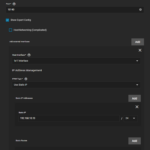
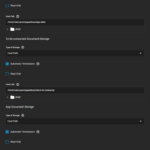
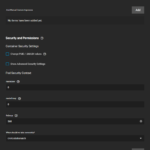
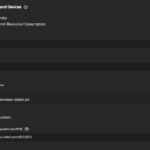
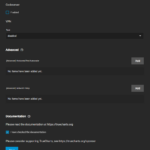
The specific configuration aspects for the apps I use are listed below:
- Heimdall:
For Heimdall, you only need to set an application name and manage the networking and the storage. The networking should be set as described before with a static IP and you should specify a dataset where Heimdall can store all of its data persistently.
- Paperless-ngx:
The configuration of Paperless is a little bit more complicated than that of Heimdall. After setting the application name, you have to set an additional environment variable to set the language of OCR. This will set German as the default and English as the secondary OCR language (see screenshots). Further, you have to set some more information which is mainly required for the first start of the app, such as the name of the admin user and its password. Also set the number of worker threads available to the Paperless backend (PAPERLESS_TASK_WORKERS and PAPERLESS_THREADS_PER_WORKER) and the web frontend (PAPERLESS_WEBSERVER_WORKERS) to values that are appropriate for you. Then change the networking settings as described before and, finally, configure storage. Paperless uses three chunks of data. Set them to individual datasets. - Uptime Kuma:
This app does not require any special configuration, since it only has one mounted data path and one network port.
AdGuardHome is installed as a virtual machine (VM). You can create it in the Virtualization tab. The reason that AdGuard Home installed as an app, is that it is apparently not possible to access this app via IPv6. Since AdGuard Home is supposed to be used as a DNS, this is a dealbreaker. There might be workarounds to make this possible for an app, but I did not get it to work.
The basic setup is the same for all VMs (see exemplary configuration below). You can create a new VM by clicking on the Add Button. Then set a name and choose Linux as the guest OS. Change the values that you need to have changed. Click on Next and change the CPU and memory options. I use 256 MiB of memory for each VM and set the CPU mode to Host Passthrough. I use 1 virtual CPU, 1 core, and 2 threads. Furthermore, I leave the CPU model blank. Click on Next. Beforehand, I created a separate dataset to store all virtual disks in. I allocate 30 GB to each VM and create the disk in this dataset. Click on Next. Attach the bridge NIC (br1). Set the installation media that you want to use. I use CentOS 7 as the base OS and specify the downloaded ISO file there. You usually do not have to change the GPU settings, so skip them and click Confirm to create the VM. You can now access the VM by clicking on Display.
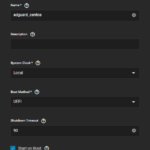
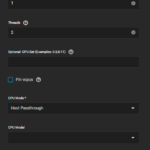
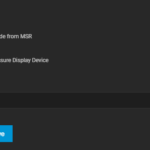
The installation process can be very different depending on the OS you want to install. Therefore, I will skip this part. To install AdGuard Home, you can follow this guide. It is important for AdGuard Home that you set the firewall rules correctly to make the services work. In particular, you need to allow incoming requests on all ports that you use, e.g., DNS, DNS-over-HTTPS, etc. See this article for an example regarding CentOS. You also have to make sure that the VM has a static IP to use it as a DNS service. You can set this in the VM itself or in your router. See this article for an example regarding CentOS. Additionally, enable DHCPv6 to also allow DNSv6 with AdGuard Home. The guide referred to before also explains the initial setup of AdGuard Home, which you need to follow to use it.
For the important data of all VMs, we want to create an NFS share on the TrueNAS SCALE host. This has the advantage that we can install the services in a different VM or in a Kubernetes app without the need to manually move the service data. Instead, we can simply mount the NFS share into the new environment. To set up such a share, we first have to create the respective dataset on the TrueNAS SCALE host. Then, create a share for these datasets by using this guide. Then, mount the respective shares in the VMs. You can follow this guide to do it in CentOS. For AdGuard Home, I use a configuration, where I create the mounted shares in the /mnt/ folder and create a symbolic link of the configuration file in the share to the installation folder of AdGuard Home. But it should also be possible to install AdGuard Home in the mounted share. Please be aware that if you use the same setup as I do, you will need to restart the AdGuard Home service every time you start the VM. The reason for this is that the share is only fully mounted after AdGuard Home has been started and, thus, it cannot read the configuration properly.
Syncing Cloud Data
The data that should be backed up on the TrueNAS system is primarily stored on Google Drive, Seafile, and in my e-mail account. While the latter is backed up via IMAP, the other data is backed up via Cloud Sync Tasks.
The e-mails are downloaded by using the tool imap-backup. imap-backup is installed in a VM since I did not find a suitable Docker image or app to run it otherwise, and I did not want to put in the effort to create a Docker image myself. The setup is pretty similar to the one of the AdGuard Home VM explained before. To install imap-backup in the VM, you first have to install Ruby and then install the respective gem (see this guide). Go through the steps of setting up imap-backup with the command imap-backup setup. Then, add it to your crontab to let it run on a schedule, e.g., once a week. See this guide on using crontab in CentOS. The NFS share for the data of imap-backup works in the same way as for AdGuard Home, but I would recommend configuring imap-backup to write the backed-up e-mails directly to the share. This way, you always have them available directly in TrueNAS SCALE.
The data in Google Drive and Seafile can be synchronized via Cloud Sync Tasks to individually created datasets. This guide explains all steps to set them up and is applicable to both clouds. The Seafile backup is realized by using WebDAV, which can be made available by a Seafile server. Please note that you have to set a password specific to the WebDAV access in your Seafile account settings. Set all other options of the task as you like and test the setup with a dry run. If WebDAV is not available, you can also access the data via the WebAPI of Seafile and download it with a script. See, for instance, this tool I created for this purpose. There is a specific guide on how to back up Google Drive using the Cloud Sync feature, which you can follow to set everything up.
Configuring DNS and Network
After all these services have been installed, we want to make sure that they all work together. Therefore, we first need to set AdGuard Home as our DNS in the router. Make sure to set the correct DNSv4 and DNSv6 addresses. The router should then automatically advertise this DNS to the devices in the network. You can also set custom DNS entries for your local devices in AdGuard Home to make them available with custom hostnames, e.g., paperless.local. Test the new DNS configuration for all devices properly. I also had to set Nameserver 1 and the Default IPv4 Gateway to the IP address of my router (see screenshot below). Otherwise, my TrueNAS SCALE host had problems connecting to the network and to run apps. Please note that it may be required to restart your devices, reset their network settings or restart the router before they use the changed DNS address.
Enabling External Access
Since we want to have an offsite backup of our data, we need to establish a connection between the primary system and the backup system. I chose to pull the data from the primary system to the backup system. Therefore, the primary system needs to be accessible from the backup system. The first step to achieve this is using a dynamic DNS service (DynDNS) that connects the local, dynamic IP address of the primary system with a static domain name. For this service, I use duckdns.org since it is free and easy to use. The main command to send your local IP to Duck DNS to match it with a static DNS entry is the following:
/usr/bin/curl --no-progress-meter http://www.duckdns.org/update/[SUBDOMAIN]/[API-KEY]As indicated, we need a subdomain at Duck DNS and an API key / user account. Follow these steps to make it work:
- Get access to Duck DNS, for example, by using your Google account.
- Create a subdomain which will be configured to point to the local network of the primary system, e.g.,
mysubdomain.duckdns.org. - Create a cron job that automatically updates the dynamic IP associated with this subdomain. Go to Settings → Advanced → Cron Jobs and click Add. The command is the one shown before. Use your own API key that you can get from the Duck DNS website and fill in your subdomain. I let the cron job run every 30 minutes, but you should decide for yourself.
- You can test if the setup works as expected by manually changing the IP on the website and then updating it via the script. You should see the updated IP after the script has run.
Now that you can connect to your local, dynamic IP via the static domain name from Duck DNS, we still need a secure way to connect to the local network. TrueNAS SCALE provides OpenVPN for this purpose. OpenVPN allows connecting to a local network with a device that is not physically connected to the network. In our case, we need to run an OpenVPN server on the primary system and a client on the backup system (or any other device that you want to connect to your network). I configured OpenVPN by using these guides (1, 2, 3). You should have a look at them for yourself. Follow these steps to configure the server:
- Create a certificate authority (CA), a server certificate, and a client certificate under Credentials → Certificates. Follow the steps to create these certificates, and make sure to use the pre-defined profiles for OpenVPN that are provided by TrueNAS SCALE. The CA is the main certificated that needs to sign all user and server certificates, while each client and the server have separate certificates.
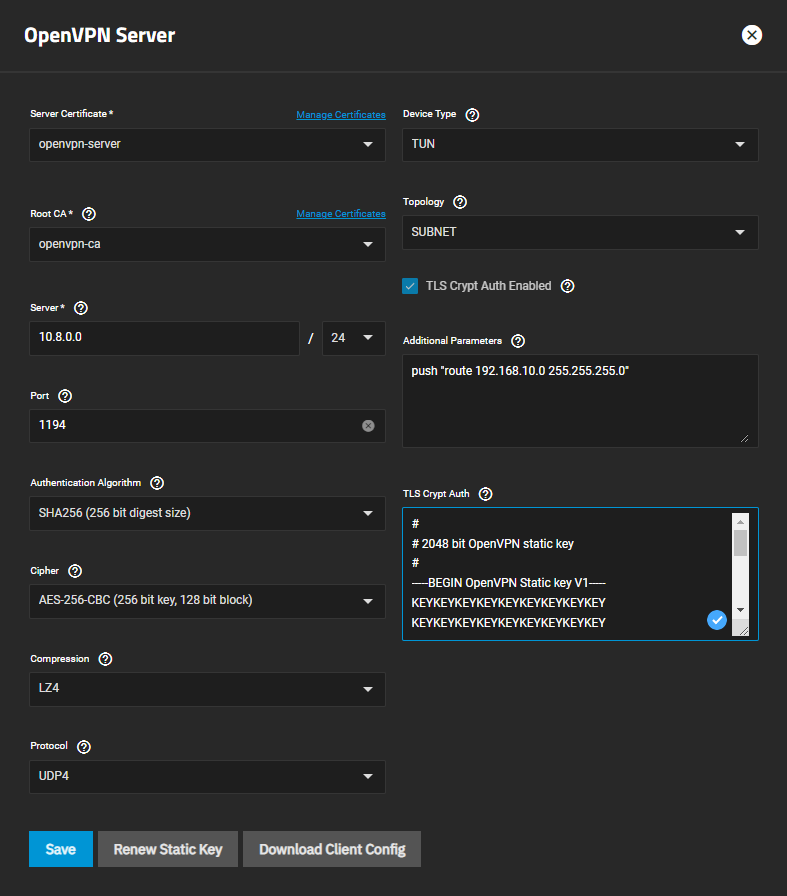
- The server is configured by navigating to Network → OpenVPN and clicking on Server. You can use a similar configuration to the one in the image below. Make sure to include the line in additional parameters and change the IP to one of your local subnet. Read the linked guides to find out more about all these parameters and configurations.
- Save the configuration and start the OpenVPN server.
In order to make a VPN connection possible from the outside, enable port forwarding in your router/firewall of port 1194 (or the port you selected) to the TrueNAS SCALE host. Now download a client configuration to test if the connection works. You have to select the client certificate you created earlier such that the client configuration is created automatically. You typically have to change the remote in this configuration to the subdomain you created earlier, e.g., mysubdomain.duckdns.org. Now test the connection by, for instance, trying to access your TrueNAS SCALE host over your phone. You should be able to log in to your TrueNAS SCALE host. Please be aware that only your TrueNAS SCALE host is accessible via OpenVPN in this basic configuration. You cannot communicate with other devices (apart from the services running in TrueNAS SCALE) in the local network. If you need to do this, there is help in the mentioned guides. However, for my setup, only connecting to the TrueNAS SCALE host and not to the entire local network is perfectly fine.
Installation of the Backup System
Setup and Initialization
The initial setup of the Synology NAS is pretty easy. You should follow the instructions in the manual to initialize and set up the NAS and make the web interface available. After this, you should be able to configure everything from there. The next steps before configuring backups are:
- Creating a shared folder on the disk which is used as the destination for the backups. You can also create a separate user to do the backups, which should then be the only user to have access to this folder.
- Configuring a power schedule in order to only let the backup system run when it is pulling backups. I set my schedule to power up the system one hour before the backup is conducted and power it down 24 hours after the backup has started. This should be enough time to transfer the data.
- Enabling E-Mail notifications to get informed when important events happen, such as disk errors.
Another important step is to set up an OpenVPN connection between the primary system and the backup system to access the data of the primary system. Therefore, the backup system is configured as a client that connects to the OpenVPN server running on the primary system. A general guide can be found here. Specifically for our OpenVPN setup, you can use any values for username and password (fields cannot be left blank) and you can leave the CA field blank (is included in the OpenVPN file). The OpenVPN file can be exported from TrueNAS SCALE by creating a new client certificate for the Synology system and using this to export a client OpenVPN file. When the OpenVPN connection is configured, test it and let it permanently connected to the OpenVPN server.
Backup Procedure
With the possibility to connect the backup system to the local network of the primary system, backups are as easy as transferring all changes of the data on a regular schedule from the primary system to the backup system. Therefore, I use the tool rsync. Rsync only transfers the differences between the data on the source (the primary system) and the data on the destination (the backup system) and is therefore efficient and fast. To use rsync, we first have to set up the rsync server on the primary system. Configure the server under System Settings → Rsync. Create a new Rsync module. Choose a name for this module and add a comment if you want. Since I want to back up all my data, I set the path to my main dataset. We can use the access mode read only and only allow a single connection at a time. Set your preferred user and the user group and enable the module. After you have started the Rsync service, you should now be able to transfer data using this tool. The main command is the following:
rsync --progress --exclude 'ix-applications' --exclude '@eaDir' --exclude 'vm-volumes' --recursive --links --perms --times --group --owner --specials --delete --compress --copy-unsafe-links --numeric-ids "[REMOTE_HOST]::[MODULE_NAME]" [DESTINATION_PATH]Fill in the respective information for your setup and you can start transferring your data. Remember that we assume to be connected via VPN such that the remote host is the local address of your TrueNAS SCALE host. I excluded several folders for my personal setup, since I do not really need backups of the data in ix-applications, for instance. You can test everything with a dry run by adding the flag --list-only.
In order to back up data on a fixed schedule, we can create a task in the task scheduler of the Synology NAS as described here. The configuration is as easy as selecting the desired schedule (e.g., once a week) and setting the rsync command from before. Test this task by manually running it and inspect if the data from the primary system is written to the shared folder on the backup system.
As a last step to protect the system configuration of the primary system, we configure regular exports of the TrueNAS SCALE configuration. Therefore, the configuration is fetched from the TrueNAS SCALE REST API and saved in our main pool. The command to do this looks something like this:
/usr/bin/curl --no-progress-meter -X POST "http://localhost/api/v2.0/config/save" -H "accept: */*" -H "Authorization: Basic [AUTHORIZATION]" -H "Content-Type: application/json" -d "{\"secretseed\":true,\"pool_keys\":true,\"root_authorized_keys\":true}" --output /mnt/main-pool/truenas-config-export/truenas-config.txtTo get your own command with our own authorization token, have a look at the API documentation available at https://[TrueNAS_HOST]/api/docs/ and try the endpoint /config/save out after logging in. Then you will see how the curl command should look like in your case. Now execute this command as a cronjob and automatically save your configuration in your data. This configuration file is also included in the backup and, hence, available to be restored in case of a failure of the boot drive. As an addition, you can also use a mirrored boot pool, as described here.
Summary and Conclusion
This article explains how to set up a NAS running TrueNAS SCALE with several apps, virtual machines, cloud sync tasks, and cron jobs. It covers a use case that is probably pretty common for most people who build a NAS for the first time. I would like to read your thoughts on my implementation, and I am particularly happy for other opinions on certain decisions.
